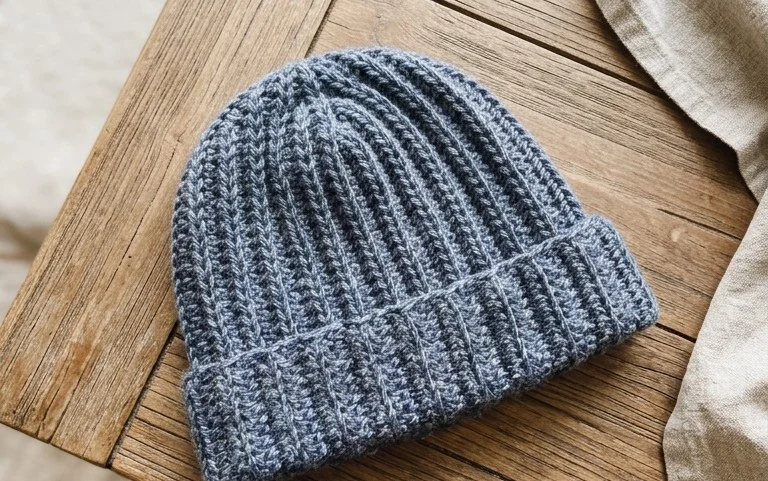
The feel of a freshly crocheted hat, warm and snug, is one of the best things about cooler weather. This Back to Basics Ribbed Crochet Hat is the kind of project that brings that comfort to life. It’s a straightforward design, relying on the beauty of simple stitches to create a wonderfully textured fabric. If you’re looking for a project that’s satisfying to make and results in a practical, stylish hat, this is it. The ribbed texture isn’t just for looks; it gives the hat a lovely stretch and a snug fit, making it perfect for everyday wear.
Yarn and Hook Recommendations: For this pattern, I recommend using a medium-weight yarn, often labeled as worsted weight or Aran weight. These yarns are widely available, come in a huge range of colors, and work up at a good pace for hat making. Acrylic yarns are a fantastic choice for beginners because they are durable, washable, and don’t split easily. Wool or wool blends are also excellent if you want extra warmth, but be mindful of washing instructions. A good starting point is a yarn with a gauge of around 16-20 stitches per 4 inches (10 cm) in US terms. Always check the yarn label for specific gauge information. For the hook, a size H-8 (5 mm) or I-9 (5.5 mm) crochet hook usually works well with worsted weight yarn. The exact size can depend on your personal tension and the specific yarn you choose. It’s a good idea to make a small swatch (about 4×4 inches) with your chosen yarn and hook to check your gauge before you start. This ensures your hat will be the right size.
Back to Basics Ribbed Crochet Hat Pattern
The feeling of a freshly crocheted hat, warm and snug, is one of the best things about cooler weather. This Back to Basics Ribbed Crochet Hat is the kind of project that brings that comfort to life. It’s a straightforward design, relying on the beauty of simple stitches to create a wonderfully textured fabric. If you’re looking for a project that’s satisfying to make and results in a practical, stylish hat, this is it. The ribbed texture isn’t just for looks; it gives the hat a lovely stretch and a snug fit, making it perfect for everyday wear.
Yarn and Hook Recommendations
For this pattern, I recommend using a medium-weight yarn, often labeled as worsted weight or Aran weight. These yarns are widely available, come in a huge range of colors, and work up at a good pace for hat making. Acrylic yarns are a fantastic choice for beginners because they are durable, washable, and don’t split easily. Wool or wool blends are also excellent if you want extra warmth, but be mindful of washing instructions. A good starting point is a yarn with a gauge of around 16-20 stitches per 4 inches (10 cm) in US terms. Always check the yarn label for specific gauge information.
For the hook, a size H-8 (5 mm) or I-9 (5.5 mm) crochet hook usually works well with worsted weight yarn. The exact size can depend on your personal tension and the specific yarn you choose. It’s a good idea to make a small swatch (about 4×4 inches) with your chosen yarn and hook to check your gauge. If you have more stitches than the pattern calls for, try a slightly larger hook. If you have fewer stitches, go down a hook size. A smooth, comfortable hook will make your crocheting experience much more enjoyable.
Stitch Techniques Used
The beauty of this hat lies in its simplicity, primarily using just a couple of fundamental crochet stitches to create that appealing ribbed texture. Understanding these stitches is key to a successful project.
- Single Crochet (sc): This is the most basic crochet stitch. You insert your hook into a stitch, yarn over, pull up a loop, yarn over again, and pull through both loops on your hook. It creates a dense, firm fabric.
- Half Double Crochet (hdc): This stitch is taller than a single crochet and shorter than a double crochet. You yarn over, insert your hook into the stitch, yarn over, pull up a loop (you’ll have three loops on your hook), yarn over, and pull through all three loops.
- Working in the Back Loop Only (BLO): This is the secret to achieving that distinct ribbed look. When you work a stitch (like single crochet or half double crochet) in the back loop only, you’re only inserting your hook under the single loop that’s furthest away from you. This leaves the front loop of the stitch exposed, creating horizontal bars that give the fabric its stretchy, ribbed appearance.
The pattern will instruct you to work rows of stitches, often alternating between rows worked normally and rows worked in the back loop only, or by consistently working certain stitches in the back loop only to build the ribbing. You’ll also use basic techniques like chaining (ch) to start rows and joining rounds (sl st) if you choose to work in the round. For this specific pattern, we focus on creating the ribbing by working specific stitches in the back loop only.
Tips for Beginners
If you’re new to crochet, this pattern is an excellent starting point. Here are a few things to keep in mind:
- Tension is Key: Try to keep your tension as consistent as possible. This means how tightly or loosely you crochet. If your tension is too tight, your stitches might be hard to work into, and your fabric will be stiff. If it’s too loose, your fabric might be gappy and won’t have the right drape. Practicing a few rows of single and half double crochet before starting the hat is a good idea.
- Count Your Stitches: It’s easy to miss stitches or add extra ones, especially when you’re starting out and working into the back loop only. At the end of each row, count your stitches to make sure you have the correct number. This will prevent your hat from getting wider or narrower unintentionally.
- Use a Stitch Marker: A stitch marker is your best friend for keeping track of the beginning and end of rows, especially if you’re working in the round. Place it in the first stitch of your row.
- Don’t Be Afraid to Undo: Everyone makes mistakes. If you realize you’ve made an error a few rows back, it’s okay to carefully pull out your stitches (this is called ‘frogging’ because you ‘rip-it, rip-it’). It’s better to fix it early than to have a lopsided hat.
- Learn the Stitches Well: Before you begin, watch a few video tutorials on single crochet, half double crochet, and specifically working in the back loop only. Seeing it done can make a big difference.
How to Customize
This basic pattern is a fantastic canvas for personalization. You can easily adapt it to suit different tastes and needs.
Colors
The simplest way to customize is with color. You can:
- Go Monochromatic: Stick with a single color for a classic, understated look.
- Create Stripes: Introduce new colors by changing yarn colors at the beginning of a row or every few rows. You can do simple two-color stripes or incorporate a rainbow of hues.
- Add a Contrasting Brim: Work the main body of the hat in one color and then switch to a contrasting color for the final few rows to create a distinct brim.
Sizes
This pattern is typically written for a standard adult size, but adjusting it for different head sizes is quite straightforward:
- For Smaller Sizes (Child/Toddler): You’ll need to make the hat shorter and possibly slightly narrower. You can achieve this by reducing the number of initial foundation chains (if applicable to the specific construction) or by working fewer rows in the main body before starting the crown shaping. Measure the head circumference of the intended recipient and compare it to the circumference of your partially worked hat.
- For Larger Sizes (Adult XL): You can make the hat longer by working more rows in the main body before starting the crown shaping. If you need a wider hat, you might also need to slightly increase the initial number of stitches or the hook size, but typically adjusting the length is sufficient for larger sizes.
- Crown Shaping: The decrease rounds at the top of the hat will need to be adjusted based on how tall you made the hat. If you worked more rows, you’ll likely need more decrease rounds.
Always measure your work against a hat that fits the intended wearer for the best results.
Care Instructions for the Finished Piece
Proper care will ensure your crocheted hat lasts for many seasons of wear. Always refer to your yarn label for the most accurate care instructions, but here are some general guidelines:
- Washing: If you used an acrylic yarn, most hats can be machine washed on a gentle cycle with cool water. For wool or wool blends, hand washing is usually best. Fill a basin with cool water and a small amount of wool wash or mild detergent. Gently agitate the water and let the hat soak for about 10-15 minutes.
- Rinsing: Rinse the hat thoroughly in cool, clean water until all soap residue is gone.
- Drying: Never put a crocheted hat in a machine dryer, as the heat can cause it to felt or lose its shape. Instead, gently squeeze out excess water without wringing. Lay the hat flat on a clean towel, reshaping it as needed. You can roll the hat up in the towel to absorb more moisture, then lay it flat on a drying rack or a fresh towel, away from direct sunlight or heat.
- Storage: Store your hat flat or gently folded in a drawer or on a shelf. Avoid hanging it for long periods, as this can stretch out the stitches.
Project Ideas
While this pattern is designed as a standalone hat, the skills you learn and the resulting fabric can be applied to many other projects:
- Matching Sets: Crochet a matching scarf, cowl, or pair of fingerless gloves to go with your hat.
- Home Decor: The ribbed texture works wonderfully for small projects like coasters, placemats, or even a decorative basket.
- Dishcloths: A simple dishcloth made with this stitch pattern is absorbent and durable.
- Baby Hats: Use a softer, baby-appropriate yarn and adjust the size for adorable baby hats.
- Pet Accessories: Consider a small hat for a pampered pet or a snuggly bed liner.
This Back to Basics Ribbed Crochet Hat is more than just a winter accessory; it’s a foundation for building your crochet confidence and a gateway to countless creative possibilities.
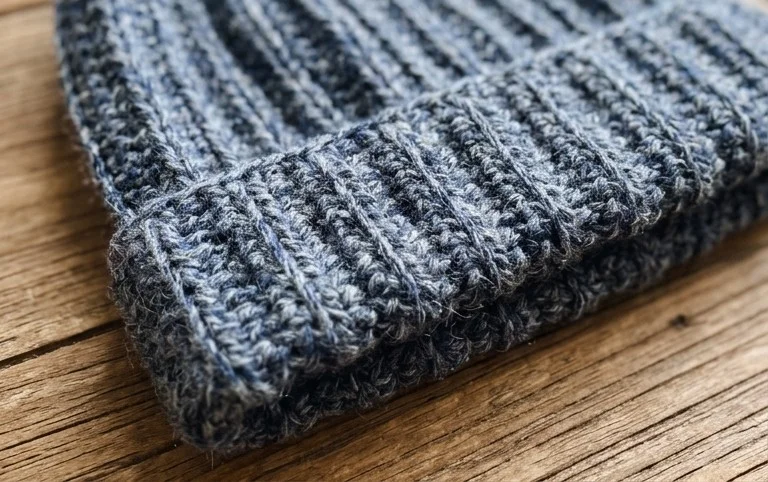
You’ve just finished your cozy, ribbed crochet hat! Seeing the textured stitches come together is so rewarding. This pattern is a great foundation, and you can easily customize it. Try a different yarn color for each stripe, or add a pom-pom on top for extra flair. If you made this hat for a friend or family member, I bet they’ll love the thoughtful, handmade gift. Don’t forget to share a picture of your finished hat on social media and tag me – I always love seeing your creations! For more projects like this one, feel free to browse the other patterns on the blog.