Easy Backpack Storage: 14+ Clever Organization Ideas
Backpack storage and organization can be a real headache, can’t it? We’ve all been there – backpacks spilling out of closets, cluttering up hallways, or getting stuffed into corners, making it hard to find what you need when you’re rushing out the door. But imagine this: a beautifully organized entryway or a tidy mudroom where every backpack has its designated spot, easily accessible and out of the way. No more tripping hazards or frantic searches! You’ll be amazed at how achievable this is, with most solutions costing under $50 and taking just an hour or two to implement. In this article, I’ll walk you through over 14 clever ideas that will transform your backpack chaos into stylish, functional order. Get ready to discover simple hacks and smart storage solutions that will make your home feel instantly calmer and more put-together.
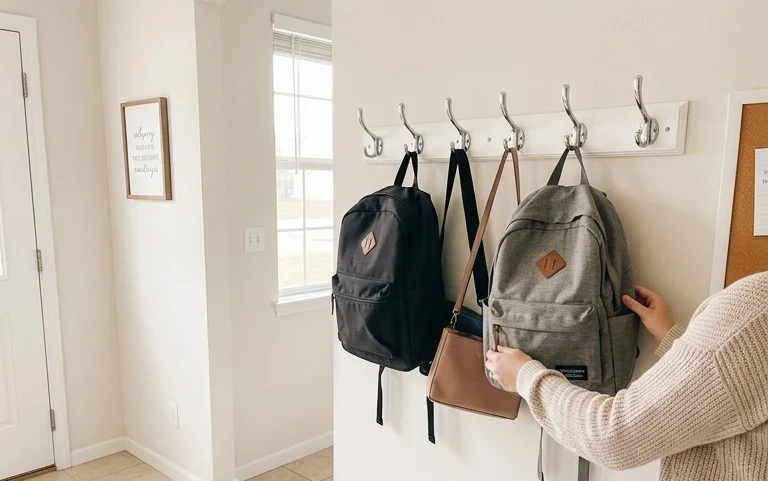
14+ Clever Ideas for Backpack Storage and Organization
Backpacks. They’re ubiquitous, versatile, and… a little bit of a clutter magnet. Whether it’s your trusty work backpack overflowing with laptops and notebooks, your kiddo’s school bag stuffed with art projects and permission slips, or your hiking pack waiting for its next adventure, these often-heavy companions can quickly take over an entryway, a bedroom floor, or even a corner of the living room. But fear not! With a little planning and some creative solutions, you can transform those backpack black holes into stylish and functional storage spaces. I’ve gathered over 14 brilliant ideas to help you conquer your backpack clutter, making your home more serene and your life a little bit easier.
Why Backpack Organization Matters
Before we dive into the nitty-gritty, let’s talk about why this is more than just tidying up. A well-organized backpack storage system means:
* **Easier retrieval:** No more digging for that one specific item.
* **Preserving your gear:** Properly stored backpacks maintain their shape and prevent damage.
* **A more aesthetically pleasing space:** A tidy entryway or bedroom instantly feels more calming.
* **Reduced stress:** Knowing where everything is can be a significant stress reliever.
What You Need and Rough Costs
The beauty of backpack organization is that it can be tailored to your budget and existing resources. Here’s a breakdown of common items and their approximate costs:
* **Hooks:** From simple adhesive hooks (around $2-$5 for a pack of 4-8) to decorative metal or wood hooks ($5-$20 each), these are your workhorses.
* **Shelving:** Floating shelves ($20-$60 each), modular cube shelves ($30-$100 per unit), or even repurposed bookcases can offer dedicated spaces.
* **Baskets and Bins:** Fabric bins ($5-$25 each), woven baskets ($10-$40 each), or clear plastic bins ($3-$15 each) are great for corralling smaller items or containing the “stuff” that spills out of backpacks.
* **Pegboards:** A standard 2ft x 3ft pegboard can cost around $15-$30, and accessories like hooks and small shelves can add another $10-$30.
* **Command Strips/Adhesive Solutions:** Essential for renters or those avoiding drilling. Packs typically range from $5-$15.
* **Screws, Anchors, and Tools:** If you’re drilling into walls, a basic toolkit with a drill, level, and screws/anchors will set you back around $50-$100 for a starter set.
* **Label Maker:** Optional but highly recommended for clarity. A good label maker costs around $30-$60.
Measuring and Planning Before You Start
This is the most crucial step, and it’s surprisingly simple. Grab a tape measure, a notepad, and a pencil.
1. **Identify Your Backpack Zone:** Where do your backpacks tend to accumulate? Is it the entryway, a mudroom, a bedroom closet, or a designated corner?
2. **Measure the Space:** Accurately measure the width, height, and depth of the chosen area. For example, if it’s an entryway wall, measure the usable wall space. If it’s a closet, measure the internal dimensions. Note any obstacles like light switches, outlets, or windows.
3. **Count Your Backpacks:** How many backpacks do you need to store? Consider different types and sizes: work bags, school bags, gym bags, daypacks.
4. **Assess Contents:** What typically goes into these backpacks? Laptops, water bottles, lunch boxes, books, keys, sunglasses? This will inform the type of organization you need.
5. **Sketch It Out:** Draw a rough sketch of your space. Mark dimensions and any existing features. Then, start doodling potential solutions. Where would hooks go? Would a shelf fit here? Could a basket slide underneath?
Your Clear Numbered Walkthrough: Implementing Backpack Storage Solutions
Let’s get practical! Here’s a general walkthrough applicable to many of the ideas below.
1. **Prepare Your Space:** Clear out the designated area. Wipe down walls or shelves. Ensure good lighting.
2. **Install Your Base System:** If using hooks, decide on placement. Use a level to ensure they’re straight. If using shelves, follow the manufacturer’s instructions for installation, ensuring they are securely anchored. For pegboards, follow the specific mounting instructions.
3. **Add Secondary Storage:** Introduce baskets, bins, or drawer units. Place them strategically to complement your hooks or shelves.
4. **Label Everything (Optional but Recommended):** If you have multiple people or multiple types of bags, labels make it clear where each item belongs. This is especially helpful for family members.
5. **Load and Evaluate:** Place your backpacks and their associated items in their new homes. See how it feels. Is it easy to access? Does anything feel out of place?
6. **Refine and Adjust:** This is where the magic happens. Swap baskets, reposition hooks, or add a small shelf if needed. Don’t be afraid to tweak until it feels *right*.
Adapting for Small Spaces or Rentals (No Drilling!)
Living in a smaller apartment or a rental doesn’t mean you have to sacrifice organization. Here are some fantastic drill-free options:
* **Over-the-Door Hooks:** These are lifesavers! Look for sturdy ones that fit snugly over your door. They can hold 2-4 backpacks easily. Cost: $10-$30.
* **Adhesive Hooks (Heavy Duty):** Brands like Command offer hooks rated for significant weight. Ensure you follow the application instructions precisely for maximum hold. Stick them on walls, inside closet doors, or on the back of furniture. Cost: $5-$15 for a pack.
* **Freestanding Shelving Units:** Consider a slim, tall bookcase or a modular cube system that doesn’t require wall mounting. Many are designed to be stable on their own. Cost: $30-$100.
* **Tension Rods in Closets:** Use tension rods across the width of a closet to hang S-hooks or smaller carabiners from, creating hanging points for lightweight backpacks. Cost: $5-$15.
* **Command Hook Strips for Accessories:** Use adhesive strips to attach small baskets or trays to walls for storing keys, sunglasses, or other items that tend to live with your backpack.
Styling Notes: Making it Look Good, Even in Use
Organization doesn’t have to be utilitarian. Here’s how to make your backpack storage a stylish feature:
* **Color Coordination:** Choose hooks, baskets, and shelves that complement your existing decor. If you have a minimalist aesthetic, opt for clean lines and neutral tones like white, black, or wood. For a more bohemian vibe, consider woven baskets and natural textures.
* **Texture Play:** Mix and match textures. Combine smooth metal hooks with rough-hewn wood shelves or soft fabric bins. This adds visual interest.
* **Strategic Placement:** Don’t just cram everything in. Consider the flow of your space. If it’s an entryway, keep frequently used items like keys and sunglasses easily accessible. For a bedroom, perhaps the backpack is tucked away in a corner or inside a closet.
* **What Goes Where:**
* **Top Shelves/Hooks:** Heavier or less frequently used backpacks.
* **Mid-Level Hooks/Shelves:** Everyday backpacks that need easy access.
* **Baskets/Lower Shelves:** Accessories like water bottles, gym shoes, hats, or even books and chargers that belong with a specific backpack.
* **Small Trays/Dishes:** Keys, wallets, sunglasses – items that need a designated “landing strip.”
* **Embrace the “Lifestyle Look”:** It’s okay for a backpack to be visible. A well-organized display can look intentional. Think of a stylish backpack on a chic hook as a functional art piece.
Keeping it Tidy After Week One
The initial organization is the easy part; maintaining it is key.
* **The “One-Touch” Rule:** When you come home, put your backpack and its contents away in their designated spot *immediately*. Don’t let it live on the floor for a “quick second.”
* **Daily 5-Minute Tidy:** Before bed, take five minutes to do a quick sweep. Put stray items back, hang up any misplaced bags, and ensure your “landing strip” for keys is clear.
* **Weekly Backpack Purge:** Once a week, take a few minutes to empty your main backpacks. Discard trash, put away items that don’t belong, and ensure everything is in its right place for the week ahead. This is especially important for kids’ school bags.
* **Involve the Family:** If it’s a shared space, make sure everyone understands the system and their role in maintaining it. Regular conversations and gentle reminders go a long way.
Mistakes That Make This Fail
Even the best intentions can go awry. Avoid these common pitfalls:
* **Over-Complicating the System:** If it’s too complex, you (or your family) won’t stick to it. Simple, accessible solutions are usually the most effective.
* **Not Measuring:** Guessing dimensions leads to buying items that don’t fit or wasting space.
* **Ignoring Weight Limits:** Using hooks or shelves that can’t support the weight of your backpacks will lead to them falling down and damaging your belongings and your walls.
* **Not Having a Dedicated “Home”:** If there isn’t a clear, logical spot for every backpack and its accessories, they’ll end up scattered.
* **Lack of Consistency:** The “it’s just for today” mentality can quickly unravel your hard work.
* **Not Adapting to Your Lifestyle:** What works for a minimalist student might not work for a busy parent. Tailor your solutions to your actual needs.
By implementing these ideas, you can transform your backpack clutter into a well-organized and stylish asset to your home. Happy organizing!
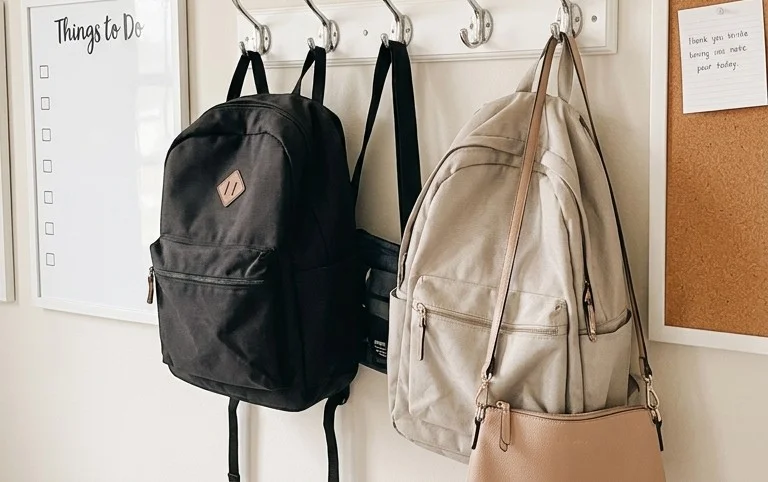
Conclusion
Implementing even a few of these clever backpack storage and organization ideas can truly transform your daily routine. Imagine the relief of knowing exactly where your essentials are, saving precious minutes and reducing morning stress. The smallest step you can take today is to identify the one backpack you use most and dedicate just 10 minutes to decluttering and finding a designated spot for it.
For a different room, consider a sleek wall-mounted rack in your entryway, perfect for keeping active bags out of sight. On a tighter budget, repurposed hooks or even a sturdy basket can work wonders in a closet.
Don’t stop here! Dive into more of our curated tips and discover the perfect backpack storage solution to bring calm and order to your space.
