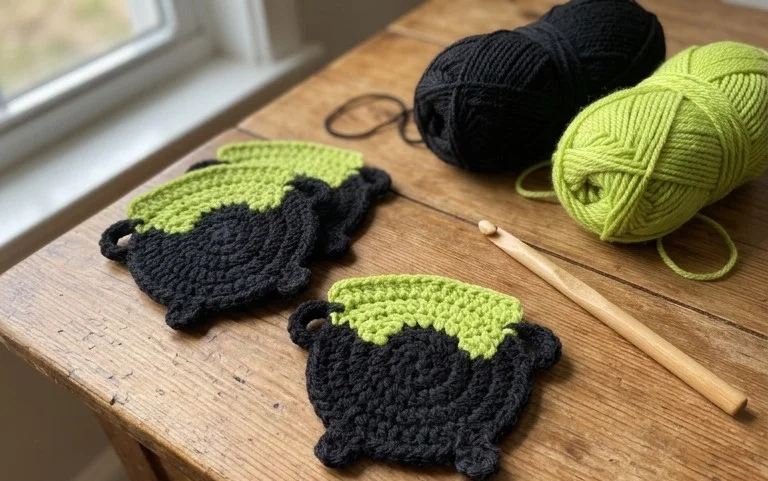
These little crochet cauldron coasters are a fun way to add a touch of spooky charm to your coffee table or dining room, especially around Halloween. They’re quick to make, surprisingly useful, and satisfyingly cute. They sit flat, protect your surfaces from condensation, and have just enough character to make people smile. They remind me of those small, dark cauldrons you see in old illustrations, ready to brew up some magic. Making them is straightforward, even if you’re relatively new to crochet.
Yarn and Hook Recommendations: For these cauldron coasters, you’ll want a yarn that has a nice weight and holds its shape well. Worsted weight cotton yarn is my top pick. Cotton is absorbent, which is great for coasters, and it doesn’t stretch out of shape as easily as acrylic. Look for brands like Lily Sugar ‘n Cream, Bernat Handicrafter, or Paintbox Yarns Cotton Aran. These come in a fantastic range of colors, perfect for creating that classic cauldron look. You can also use acrylic yarn if you prefer, but be mindful that it might stretch a bit more over time. For the hook, a size H-8 (5.0 mm) crochet hook usually works perfectly with worsted weight yarn, giving you a nice, firm fabric. If your stitches are consistently too tight, try going up a hook size (like an I-9 or 5.5 mm). If they’re too loose and gappy, try going down a size (like a G-6 or 4.0 mm).
Essential Stitch Techniques: These coasters rely on just a few fundamental crochet stitches. You’ll need to know how to make a magic ring (or a chain 4 and slip stitch to form a ring), single crochet (sc), and how to work in joined rounds with a slip stitch (sl st). A standing single crochet can be a neat way to start rounds without a visible seam, but it’s not essential if you’re a beginner. We’ll be working in continuous rounds for the main body of the cauldron, which is a common technique for amigurumi and other round crochet items. This method helps minimize visible seams. The handles are worked separately and then attached, giving the coaster a more defined, three-dimensional look. Don’t worry if you haven’t done joined rounds before; it’s simple to pick up, and I’ll explain it clearly.
Crocheting Your Own Cauldron Coasters
These little crochet cauldron coasters are a fun way to add a touch of spooky charm to your coffee table or dining room, especially around Halloween. They’re quick to make, surprisingly useful, and satisfyingly cute. They sit flat, protect your surfaces from condensation, and have just enough character to make people smile. They remind me of those small, dark cauldrons you see in old illustrations, ready to brew up some magic. Making them is straightforward, even if you’re relatively new to crochet.
Yarn and Hook Recommendations
For these cauldron coasters, you’ll want a yarn that has a nice weight and holds its shape well. Worsted weight cotton yarn is my top pick. Cotton is absorbent, which is great for coasters, and it doesn’t stretch out of shape as easily as acrylic. Look for brands like Lily Sugar ‘n Cream, Bernat Handicrafter, or Paintbox Yarns Cotton Aran. These come in a fantastic range of colors, perfect for creating that classic cauldron look. You can also use acrylic yarn if you prefer, but be mindful that it might stretch a bit more over time. For the hook, a size H-8 (5.0 mm) crochet hook usually works perfectly with worsted weight yarn, giving you a nice, firm fabric. If your stitches are consistently too tight, try going up a hook size (like an I-9 or 5.5 mm). If they’re too loose and gappy, try going down a size (like a G-6 or 4.0 mm).
Essential Stitch Techniques
These coasters rely on just a few fundamental crochet stitches, making them very accessible. The main stitches you’ll be working with are:
- Magic Ring (or Magic Circle): This is a great way to start crocheting in the round without a hole in the center. If you find it tricky at first, don’t worry! You can also start with a chain 2 and work your first round of stitches into the second chain from the hook.
- Single Crochet (sc): This is the most basic stitch. You’ll insert your hook into a stitch, yarn over, pull up a loop (you’ll have two loops on your hook), yarn over again, and pull through both loops.
- Increase (inc): This simply means working two single crochet stitches into the same stitch. This is how we get the coaster to grow in a flat circle.
- Slip Stitch (sl st): Used to join rounds and move your yarn around without adding height. You insert your hook into a stitch, yarn over, and pull through both the stitch and the loop on your hook.
Tips for Beginner Crocheters
If you’re just starting out, these coasters are an excellent project to build your confidence. Here are a few pointers:
- Tension is Key: Try to keep your stitches consistent. If your tension is too tight, your hook might struggle to go through the stitches. If it’s too loose, the fabric might look uneven and gappy. Practice a few rows of single crochet before starting the coaster to get a feel for your tension.
- Count Your Stitches: It’s easy to miss a stitch or accidentally add one, especially in the early rounds. At the end of each round, count your stitches to make sure you have the correct number. This will prevent your coaster from ruffling (too many stitches) or cupping (not enough stitches).
- Use a Stitch Marker: Place a stitch marker in the first stitch of each round. This helps you know exactly where the beginning of the round is, making it easier to join neatly and to know where to place your first stitch in the next round.
- Don’t Be Afraid to Rip Back (Frog it!): Everyone makes mistakes. If you realize you’ve made an error a few rounds back, it’s often easier to pull out the stitches (this is called “frogging” because you “rip-it, rip-it”) and redo them correctly. It’s part of the learning process.
- Watch Video Tutorials: Sometimes seeing a stitch or technique demonstrated can make all the difference. Look up tutorials for “magic ring crochet,” “how to single crochet,” and “how to crochet in the round.”
Customizing Your Cauldron Coasters
These coasters are wonderfully customizable. The most obvious way is with color. The classic cauldron is black, of course, but you can get creative!
- Colors:
- Classic Black: For a traditional cauldron look.
- Dark Green or Brown: For a slightly different, earthy potion vibe.
- Deep Purple or Navy Blue: For a more mystical feel.
- Add a “Bubble” or “Steam”: You could work a few rounds in white or a contrasting color around the top edge to represent bubbling potion or steam.
- Gradient Yarn: A self-striping or gradient yarn can create a really unique effect without you having to change colors.
- Sizes: The pattern is designed to create a coaster of a certain size. If you want a larger coaster, simply continue working additional rounds of single crochet, always increasing in each stitch of the previous round, until you reach your desired diameter. For smaller coasters, you might stop the pattern a round or two earlier.
- Handles: For an extra touch, you could crochet a small chain and attach it to opposite sides of the coaster to create tiny “handles,” though this might make them less practical for stacking.
Caring for Your Finished Coasters
Once your cauldron coasters are finished, they are quite durable, especially if made with cotton yarn. To keep them looking their best:
- Washing: Most cotton yarns can be machine washed on a gentle cycle with cool or warm water. Avoid using bleach.
- Drying: Lay flat to dry is the best method to prevent stretching or misshaping. You can also tumble dry on low heat, but air drying is gentler.
- Stains: For stubborn stains, a little mild detergent can be used.
Project Ideas Beyond Coasters
While these are designed as coasters, their shape and size can lend themselves to other small projects:
- Mini Planter Covers: Pop a small succulent or air plant pot inside for a themed planter.
- Bowl Fillers: Use them as decorative elements in a candy dish or a curio cabinet.
- Appliqués: They can be sewn onto bags, hats, or other fabric items for a decorative patch.
- Small Pouches: With a few modifications, you could stitch two together and add a drawstring to make tiny pouches for jewelry or small treasures.
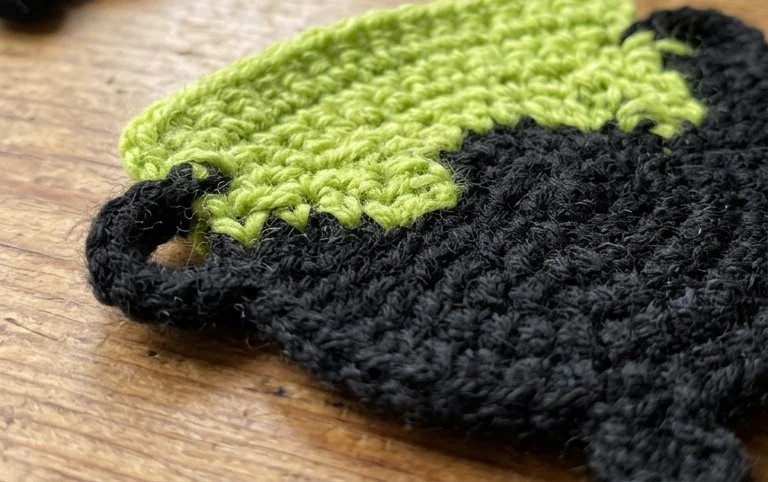
You’ve got all the information you need to crochet these fun cauldron coasters. They’re a fantastic project for using up scrap yarn and practicing basic stitches. Once you’ve made a few, try experimenting with different yarn colors – maybe a metallic grey or even a deep purple! You could also add a tiny bit of stuffing inside the handle before attaching it for a slightly puffier look. I’d love to see your finished cauldrons! Share a photo on Instagram and tag me so I can admire your spooky creations. Don’t forget to check out my other crochet patterns for more seasonal decor ideas!